I'm excited to be taking you through this long awaited tutorial, finally. I'll show you how to build a complete blog application from scratch using PHP and MySQL database. A blog as you know it is an application where some users (Admin users) can create, edit, update and publish articles to make them available in the public to read and maybe comment on. Users and the public can browse through a catalog of these articles and click to anyone to read more about the article and comment on them.
ez_adFeatures:
- A user registration system that manages two types of users: Admin and Normal Users
- The blog will have an admin area and a public area separate from each other
- The admin area will be accessible only to logged in admin users and the public area to the normal users and the general public
- In the admin section, two types of admins exist:
-
Admin:
- Can create, view, update, publish/unpublish and delete ANY post.
- Can also create, view, update and delete topics.
- An Admin user (and only an Admin user) can create another admin user or Author
- Can view, update and delete other admin users
-
Author:
- Can create, view, update and delete only posts created by themselves
- They cannot publish a post. All publishing of posts is done by the Admin user.
-
Admin:
- Only published posts are displayed in the public area for viewing
- Each post is created under a particular topic
- A many-to-many relationship exists between posts and topics.
- The public page lists posts; each post displayed with a featured image, author, and date of creation.
- The user can browse through all posts listings under a particular topic by clicking on the topic
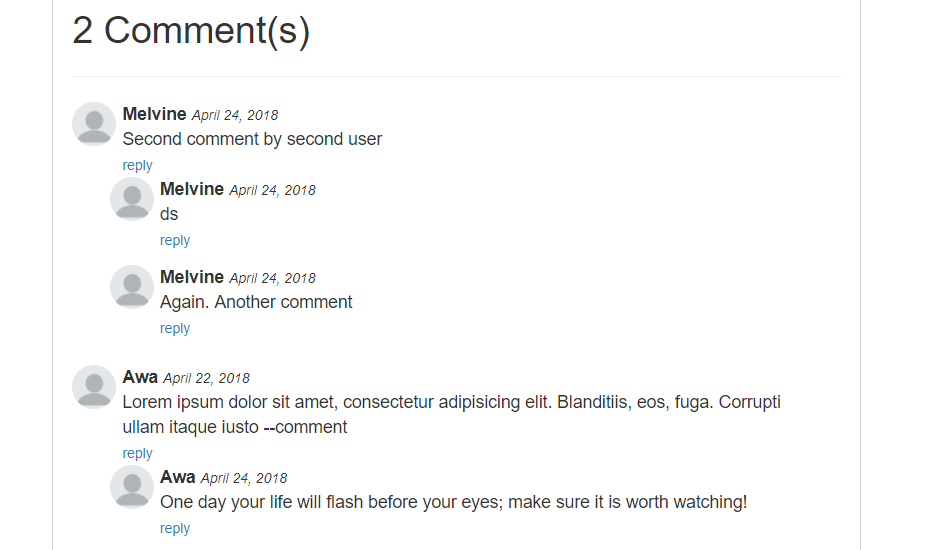
- When a user clicks on a post, they can view the full post and comment at the bottom of the posts.
- A Disqus commenting system is implemented which allows users to comment using social media accounts with platforms like Facebook, GooglePlus, Twitter.
Implementation
Okay straight away let's start coding.
We'll call the project complete-blog-php. On your server directory (htdocs or www), create a folder named complete-blog-php. Open this folder in a text editor of your choice, for example, Sublime Text. Create the following subfolders inside it: admin, includes, and static.
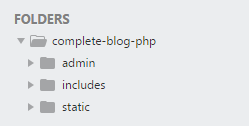
The 3 folders will hold the following contents:
- admin: Will hold files for the admin backend area. Files concerned with creating, viewing, updating and deleting posts, topics, users.
- includes: Will hold files containing pieces of code that will be included into one or more other pages. E.g. Files for error display
- static: Hold static files such as images, CSS stylesheets, Javascript.
In the root folder of the application, create a file named index.php:
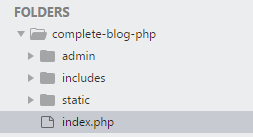
Open it up and paste this code in it:
<!DOCTYPE html>
<html>
<head>
<!-- Google Fonts -->
<link href="https://fonts.googleapis.com/css?family=Averia+Serif+Libre|Noto+Serif|Tangerine" rel="stylesheet">
<!-- Styling for public area -->
<link rel="stylesheet" href="static/css/public_styling.css">
<meta charset="UTF-8">
<title>LifeBlog | Home </title>
</head>
<body>
<!-- container - wraps whole page -->
<div class="container">
<!-- navbar -->
<div class="navbar">
<div class="logo_div">
<a href="index.php"><h1>LifeBlog</h1></a>
</div>
<ul>
<li><a class="active" href="index.php">Home</a></li>
<li><a href="#news">News</a></li>
<li><a href="#contact">Contact</a></li>
<li><a href="#about">About</a></li>
</ul>
</div>
<!-- // navbar -->
<!-- Page content -->
<div class="content">
<h2 class="content-title">Recent Articles</h2>
<hr>
<!-- more content still to come here ... -->
</div>
<!-- // Page content -->
<!-- footer -->
<div class="footer">
<p>MyViewers © <?php echo date('Y'); ?></p>
</div>
<!-- // footer -->
</div>
<!-- // container -->
</body>
</html>
Between the <head></head> tags, we've included links to some Google Fonts. There's also a link to our styling file public_styling.css, which we'll create in a minute.
Notice also the <div> element with a class set to container that wrap our entire application including the navbar, page content and footer sections of the page.
To view this in your browser, go to http://localhost/complete-blog-php/index.php.
Doesn't look as cool as you would've loved right?
vli_adThe static folder as stated earlier will hold, among other things, styling for the site. Create 3 subfolders inside static folder: css, images, js. In the css subfolder you just created, create a file named public_styling.css.
Open public_styling.css and add this styling code to it:
/****************
*** DEFAULTS
*****************/
* { margin: 0px; padding: 0px; }

html { height: 100%; box-sizing: border-box; }
body {
  position: relative;
  margin: 0;
  padding-bottom: 6rem;
  min-height: 100%;
}
/* HEADINGS DEFAULT */
h1, h2, h3, h4, h5, h6 { color: #444; font-family: 'Averia Serif Libre', cursive; }
a { text-decoration: none; }
ul, ol { margin-left: 40px; }
hr { margin: 10px 0px; opacity: .25; }

/* FORM DEFAULTS */
form h2 {
        margin: 25px auto;
        text-align: center;
        font-family: 'Averia Serif Libre', cursive;
}
form input {
        width: 100%;
        display: block;
        padding: 13px 13px;
        font-size: 1em;
        margin: 5px auto 10px;
        border-radius: 3px;
        box-sizing : border-box;
        background: transparent;
        border: 1px solid #3E606F;
}
form input:focus {
        outline: none;
}
/* BUTTON DEFAULT */
.btn {
        color: white;
        background: #4E6166;
        text-align: center;
        border: none;
        border-radius: 5px;
        display: block;
        letter-spacing: .1em;
        margin: 10px 0px;
        padding: 13px 20px;
        text-decoration: none;
}
.container {
        width: 80%;
        margin: 0px auto;
}
/* NAVBAR */
.navbar {
        margin: 0 auto;
    overflow: hidden;
        background-color: #3E606F;
    border-radius: 0px 0px 6px 6px;
}
.navbar ul {
    list-style-type: none;
    float: right;
}
.navbar ul li {
    float: left;
    font-family: 'Noto Serif', serif;
}
.navbar ul li a {
    display: block;
    color: white;
    text-align: center;
    padding: 20px 28px;
    text-decoration: none;
}
.navbar ul li a:hover {
        color: #B9E6F2;
    background-color: #334F5C;
}

/* LOGO */
.navbar .logo_div {
        float: left;
        padding-top: 5px;
        padding-left: 40px;
}
.navbar .logo_div h1 {
        color: #B9E6F2;
        font-size: 3em;
        letter-spacing: 5px;
        font-weight: 100;
        font-family: 'Tangerine', cursive;
}

/* FOOTER */
.footer {
  position: absolute;
  right: 0;
  bottom: 0;
  left: 0;
  color: white;
  background-color: #73707D;
  text-align: center;
  width: 80%;
  margin: 20px auto 0px;
  padding: 20px 0px;
}
This code starts with default styling for the site followed by styling for navbar and that for the footer.
Reload the page in the browser. Our simple page now has a nice looking navbar with a logo, some beautiful fonts, and, if you scroll down, our footer is hiding somewhere at the bottom. Great!
ez_adOur page, however, has a few code segments that will be repeated across many other pages of the website. For instance, most pages will need a navbar and the footer as well as the links to the styling and fonts that are in the head section. In PHP, we can write a piece of code in one file and include it at a particular position in several other files. This is the same as writing that same code in those locations but with the advantage that it prevents repetition of code. We do this using the include or require keywords.
As you may have already guessed, it is time to make use of our includes folder we created at the beginning. The sections that are repeating are the head section, the navbar, and the footer. So in your includes folder, create 3 files namely head_section.php, navbar.php and footer.php.
.png.2018-02-18.1518947179.png)
Go to the index.php file, select the part of the code from the first line down to and including the <meta charset="UTF-8"> tag directly above your <title> tags and cut it. Now head over to the newly created file complete-blog-php/includes/head_section.php and paste the code in it.
So the head_section.php file has the following code:
<!DOCTYPE html>
<html>
<head>
        <!-- Google Fonts -->
        <link href="https://fonts.googleapis.com/css?family=Averia+Serif+Libre|Noto+Serif|Tangerine" rel="stylesheet">
        <!-- Styling for public area -->
        <link rel="stylesheet" href="static/css/public_styling.css">
        <meta charset="UTF-8">
Back in your index.php file, replace the code you just cut with the following line:
<?php require_once('includes/head_section.php') ?>
Note that the line that immediately follows this include line is the <title> tag. We didn't include the <title> tag in the head_section.php file because the title of each page might have to be different from the others for Search Engine Optimization purposes.
ez_adNow let's do the same with the navbar section and the footer.
In your index.php file, select and cut the navbar code where it is indicated with a comment and paste it inside navbar.php in the includes folder. Here is navbar.php after pasting:
<div class="navbar">
        <div class="logo_div">
                <a href="index.php"><h1>LifeBlog</h1></a>
        </div>
        <ul>
          <li><a class="active" href="index.php">Home</a></li>
          <li><a href="#news">News</a></li>
          <li><a href="#contact">Contact</a></li>
          <li><a href="#about">About</a></li>
        </ul>
</div>
Then in place of the navbar in your index.php, add this line:
<!-- navbar -->
<?php include('includes/navbar.php') ?>
As for the footer, select and cut the code from the opening footer <div> tag right down to the last line in the page, and paste it in the newly created footer.php file. Here is footer.php file after pasting:
<div class="footer">
<p>MyViewers © <?php echo date('Y'); ?></p>
</div>
</div>
<!-- // container -->
</body>
</html>ez_ad
Then replace this section in the index.php page with the include for footer.php
<!-- footer -->
<?php include('includes/footer.php') ?>
After all this rearrangement, our index.php file looks like this:
<?php require_once('includes/head_section.php') ?>
        <title>LifeBlog | Home </title>
</head>
<body>
        <!-- container - wraps whole page -->
        <div class="container">
                <!-- navbar -->
                <?php include('includes/navbar.php') ?>

                <!-- Page content -->
                <div class="content">
                        <h2 class="content-title">Recent Articles</h2>
                        <hr>
                        <!-- more content still to come here ... -->
                </div>
                <!-- // Page content -->

                <!-- footer -->
                <?php include('includes/footer.php') ?>
If you reload the page there won't be any change observed.
Now let's add a banner on the homepage immediately below the navbar. Create a new file named banner.php in your complete-blog-php/includes folder and paste this code in it:
<div class="banner">
<div class="welcome_msg">
<h1>Today's Inspiration</h1>
<p>
One day your life <br>
will flash before your eyes. <br>
Make sure it's worth watching. <br>
<span>~ Gerard Way</span>
</p>
<a href="register.php" class="btn">Join us!</a>
</div>
<div class="login_div">
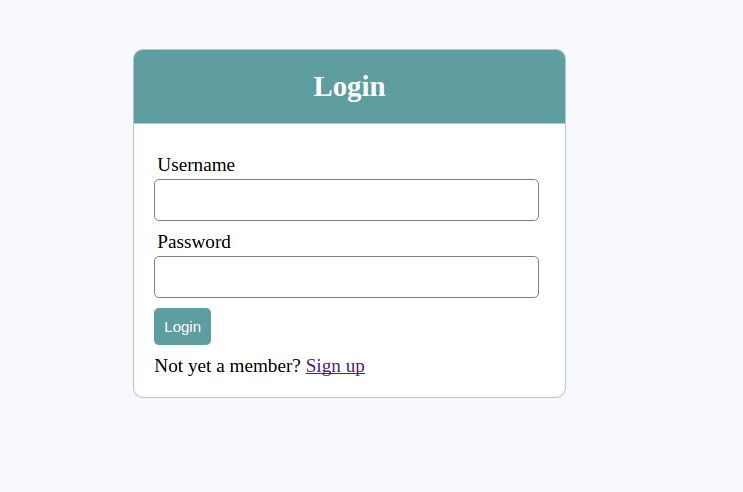
<form action="index.php" method="post" >
<h2>Login</h2>
<input type="text" name="username" placeholder="Username">
<input type="password" name="password" placeholder="Password">
<button class="btn" type="submit" name="login_btn">Sign in</button>
</form>
</div>
</div>
Include this in your index.php immediately below the navbar include:
<!-- navbar is up here... -->

<!-- banner -->
<?php include('includes/banner.php') ?>
PLEASE DOWNLOAD this image, rename it to banner.jpg and place it in your complete-blog-php/static/images/ folder. It is the background image to the banner.
Once you've done that, add this CSS code in your public_styling.css file; it is styling for the banner:
/* BANNER: Welcome message; */
.banner {
        margin: 5px auto;
        min-height: 400px;
        color: white;
        border-radius: 5px;
        background-image: url('../images/banner.jpg');
        background-size: 100% 100%;
}
.banner .welcome_msg {
        width: 45%;
        float: left;
        padding: 20px;
}
.banner .welcome_msg h1 {
        color: #B9E6F2;
        margin: 25px 0px;
        font-size: 2.4em;
        font-family: 'Averia Serif Libre', cursive;
}
.banner .welcome_msg p {
        color: white;
        font-size: 1.5em;
        line-height: 1.8em;
    font-family: 'Noto Serif', serif;
}
.banner .welcome_msg p span {
        font-size: .81em;
        color: #3E606F;
}
.banner .welcome_msg a {
        width: 30%;
        margin: 20px 0px;
        padding: 12px 15px;
        font-size: 1.2em;
        text-decoration: none;
}
.banner .welcome_msg a:hover {
        background: #374447;
}

/* BANNER: Login Form; */
.banner .login_div {
        width: 50%;
        float: left;
}
.banner .login_div form {
        margin-top: 40px;
}
.banner .login_div form h2 {
        color: white;
        margin-bottom: 20px;
    font-family: 'Noto Serif', serif;
}
.banner .login_div form input {
        width: 60%;
        color: white;
        border: 1px solid white;
        margin: 10px auto;
        letter-spacing: 1.3px;
    font-family: 'Noto Serif', serif;
}
.banner .login_div form button {
        display: block;
        background: #006384;
        margin-left: 20%;
}
Reload the page now.
ez_adIf you did everything correctly, then you'll have a beautiful banner with the image banner.jpg on its background, a login form to the right and an inspiring quote together with a 'Join Us' button on the left. Cool!
Let's create a file to initialize our application's global variables. In the root folder (complete-blog-php) of your application, create a file named config.php and paste this code into it:
<?php
        session_start();

        // connect to database
       // coming soon...

        define ('ROOT_PATH', realpath(dirname(__FILE__)));
        define('BASE_URL', 'http://localhost/complete-blog-php/');
?>
ROOT_PATH is set to the physical address with respect to the operating system, to the current directory on which this file (config.php) resides. On my machine for example, ROOT_PATH has the value /opt/lampp/htdocs/complete-blog-php/. It is used to include physical files like PHP source code files (like the ones we just included), physical downloadable files like images, video files, audio files, etc. But in this tutorial, we will use it only to include PHP source files.
BASE_URL is merely a web address that sets a URL pointing to the root of our website. In our case, its value is http://localhost/complete-blog-php. It is used to form links to CSS, images, javascript.
I hope I explained those two variables well enough. If you didn't understand, just stick around, you might figure it out as we use the variables.
ez_adNow let's include the newly created config.php file as our very first line in index.php. After including it, we are going to modify the four places in our code where we included other code segments so that they now use the variable ROOT_PATH in pointing to those included files. After all these changes, our index.php will look like this:
<!-- The first include should be config.php -->
<?php require_once('config.php') ?>
<?php require_once( ROOT_PATH . '/includes/head_section.php') ?>
        <title>LifeBlog | Home </title>
</head>
<body>
        <!-- container - wraps whole page -->
        <div class="container">
                <!-- navbar -->
                <?php include( ROOT_PATH . '/includes/navbar.php') ?>
                <!-- // navbar -->

                <!-- banner -->
                <?php include( ROOT_PATH . '/includes/banner.php') ?>
                <!-- // banner -->

                <!-- Page content -->
                <div class="content">
                        <h2 class="content-title">Recent Articles</h2>
                        <hr>
                        <!-- more content still to come here ... -->
                </div>
                <!-- // Page content -->

                <!-- footer -->
                <?php include( ROOT_PATH . '/includes/footer.php') ?>
                <!-- // footer -->
This way of including files has the advantage that, if later on some files are moved to other directories, we may not need to update the includes. Also if we decide to change the path to the root directory, we will only do that in one place, that is, in the config.php file.
We are done with the basic setup of the public area. So far the application isn't dynamic. We haven't created a database yet and if you click on the join us button, you'll get an error that says "file not found". User login has not yet been implemented too. These will all be dealt with in the next parts of this tutorial.
I hope you enjoyed it. If you liked this post and want more, please don't forget to share with your friends using any of the social media links below. Thanks
Next part: The database design.
ez_ad