When writing an article on your blog, you will often need to display pictures in between texts usually for illustration purposes. CKEditor helps you achieve this but it can be a bit tricky or hard to work with if you are not using a plugin. The reason is that CKEditor only accepts the URL of the image to be inserted into the post text, and the image must already exist on the internet and not on your local machine.
What we need to do now is to find a way to get the image uploaded to an images directory in our project while we are still writing the post; once the image has been uploaded, the URL of the image will be sent back which we can then use in our CKEditor.
First thing is that we will add a button which when clicked browses the user's local computer for images (in the same way that a click on an <input type= "file" /> element would do). Once the user selects an image, that image is immediately uploaded in the background using Ajax (without reloading the page) in an onChange event and the URL of that particular image is returned from the server. The URL returned is displayed in a pop-up modal which gets copied to clipboard when the user clicks on it. The user can now click on the image icon on the CKEditor and paste the URL of the image in it.
ez_adLet's implement this on a mini-project and see how it works.
Create a folder called ckeditor-images and inside this folder, create a subfolder called images, and 4 files namely: index.php, server.php, scripts.js, and main.css.
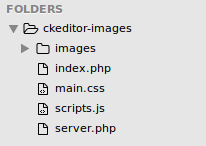
The images folder will hold the images uploaded from our CKEditor.
Open index.php up and place the following code in it.
index.php:
<?php include('server.php') ?>
<!DOCTYPE html>
<html lang="en">
<head>
<meta charset="UTF-8">
<title>Uploading images in CKEditor using PHP</title>
<!-- Bootstra CSS -->
<link rel="stylesheet" href="https://cdnjs.cloudflare.com/ajax/libs/twitter-bootstrap/3.3.7/css/bootstrap.min.css" />
<!-- Custom styling -->
<link rel="stylesheet" href="main.css">
</head>
<body>
<div class="container">
<div class="row">
<div class="col-md-8 col-md-offset-2 post-div">
<!-- Display a list of posts from database -->
<?php foreach ($posts as $post): ?>
<div class="post">
<h3>
<a href="details.php?id=<?php echo $post['id'] ?>"><?php echo $post['title']; ?></a>
</h3>
<p>
<?php echo html_entity_decode(preg_replace('/\s+?(\S+)?$/', '', substr($post["body"], 0, 200))); ?>
</p>
</div>
<?php endforeach ?>
<!-- Form to create posts -->
<form action="index.php" method="post" enctype="multipart/form-data" class="post-form">
<h1 class="text-center">Add Blog Post</h1>
<div class="form-group">
<label for="title">Title</label>
<input type="text" name="title" class="form-control" >
</div>
<div class="form-group" style="position: relative;">
<label for="post">Body</label>
<!-- Upload image button -->
<a href="#" class="btn btn-xs btn-default pull-right upload-img-btn" data-toggle="modal" data-target="#myModal">upload image</a>
<!-- Input to browse your machine and select image to upload -->
<input type="file" id="image-input" style="display: none;">
<textarea name="body" id="body" class="form-control" cols="30" rows="5"></textarea>
</div>
<div class="form-group">
<button type="submit" name="save-post" class="btn btn-success pull-right">Save Post</button>
</div>
</form>
<!-- Pop-up Modal to display image URL -->
<div class="modal fade" id="myModal" tabindex="-1" role="dialog" aria-labelledby="myModalLabel">
<div class="modal-dialog" role="document">
<div class="modal-content">
<div class="modal-header">
<button type="button" class="close" data-dismiss="modal" aria-label="Close"><span aria-hidden="true">×</span></button>
<h4 class="modal-title" id="myModalLabel">Click below to copy image url</h4>
</div>
<div class="modal-body">
<!-- returned image url will be displayed here -->
<input
type="text"
id="post_image_url"
onclick="return copyUrl()"
class="form-control"
>
<p id="feedback_msg" style="color: green; display: none;"><b>Image url copied to clipboard</b></p>
</div>
</div>
</div>
</div>
</div>
</div>
</div>
<!-- JQuery -->
<script src="https://cdnjs.cloudflare.com/ajax/libs/jquery/3.3.1/jquery.min.js"></script>
<!-- Bootstrap JS -->
<script src="https://cdnjs.cloudflare.com/ajax/libs/twitter-bootstrap/3.3.7/js/bootstrap.min.js"></script>
<!-- CKEditor -->
<script src="https://cdnjs.cloudflare.com/ajax/libs/ckeditor/4.8.0/ckeditor.js"></script>
<!-- custom scripts -->
<script src="scripts.js"></script>
</body>
</html>
As you can see we have added bootstrap CSS and JS through CDN. We also added JQuery because we are going to be uploading the images using Ajax calls. Lastly, we added the CKEditor plugin code which we are still to initialize on our textarea in the form. scripts.js is where the JQuery script will reside.
vli_ad
Just after the post form, we added some code for the pop-up modal with id set to id="myModal". This modal is not being used now but when the image has been uploaded, the returned URL of the image will be displayed on this modal. So forget about it for now.
If you go to http://localhost/ckeditor-images/index.php, you will see the static post displayed and the form. Open main.css and let's add a few styles to this page.
main.css:
p {
        font-size: 1.1em;
}
.post {
        border: 1px solid #ccc;
        padding: 10px;
        margin-top: 15px;
}
.post h3 {
        margin: 0px;
}
.post-div {
        border: 1px solid #ccc;
        margin-top: 30px;
        margin-bottom: 30px;
        padding: 20px;
}
.post-form {
        margin-top: 80px;
}
/*DETAILS PAGE*/
.post-details p {
        text-align: justify;
        margin: 20px auto;
        font-size: 1.2em;
}
.upload-img-btn {
        position: absolute;
        z-index: 9;
        top: 35px;
        right: 5px;
}
Open scripts.js and add this code inside it:
scripts.js:
// initialize ckeditor
CKEDITOR.replace('body');
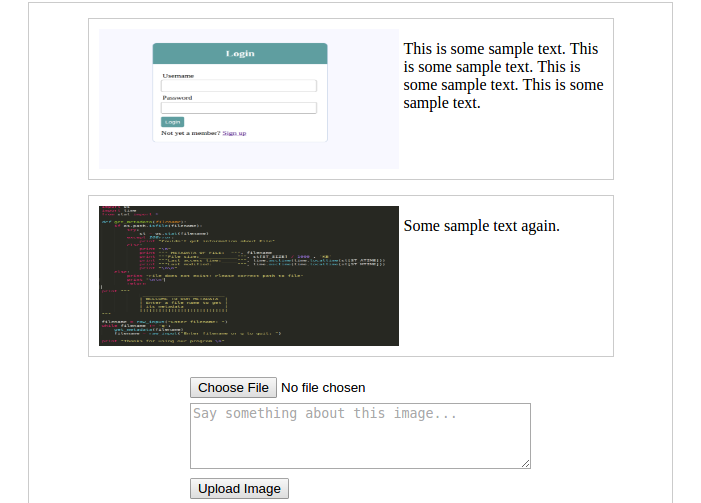
Refresh the page and you will notice some change in styling as well as the textarea that is now our CKEditor loaded with many icons.
vli_adCreate a database called ckeditor-images. In this database, create a table called posts with fields:
- id - INT(11)
- title - VARCHAR(255)
- body - VARCHAR(255)
Now insert one or more dummy posts into the posts table so that we can query it and display on the page.
Connecting to database
Open server.php up and enter this code in it:
<?php
        // connect to database
        $db = mysqli_connect("localhost", "root", "", "ckeditor-images");

        // retrieve posts from database
        $result = mysqli_query($db, "SELECT * FROM posts");
        $posts = mysqli_fetch_all($result, MYSQLI_ASSOC);
?>
This code retrieves the posts that are in the database into a $posts variable. This variable is made available in our index.php file by the include statement at the first line of code in index.php -- the line that includes the server.php file inside index.php.
In index.php file, remove the entire div element that has attribute class="post" and replace it with this code:
// ... more code here

<?php if (isset($posts)): ?>
        <?php foreach ($posts as $post): ?>
                <div class="post">
                        <h3>
                                <a href="details.php?id=<?php echo $post['id'] ?>"><?php echo $post['title'] ?></a>
                        </h3>
                        <p><?php echo $post['body']; ?></p>
                </div>
        <?php endforeach ?>
<?php else: ?>
        <h2>No posts available</h2>
<?php endif ?>

// ... more code here
ez_ad
As you can see, each post when clicked on its title, leads to the details.php passing the id of the post to it. Create a file named details.php and paste this code in it:
details.php:
<?php
        // connect to database
    $db = mysqli_connect("localhost", "root", "", "ckeditor-images");

        if (isset($_GET['id'])) {
                $id = $_GET['id'];
                $result = mysqli_query($db, "SELECT * FROM posts WHERE id=$id");

                $post = mysqli_fetch_assoc($result);
        }
?>
<!DOCTYPE html>
<html lang="en">
<head>
        <meta charset="UTF-8">
        <title>Uploading images in CKEditor using PHP</title>

        <!-- Bootstra -->
        <link rel="stylesheet" href="https://cdnjs.cloudflare.com/ajax/libs/twitter-bootstrap/3.3.7/css/bootstrap.min.css" />

        <!-- Custom styling -->
        <link rel="stylesheet" href="main.css">

</head>
<body>

        <div class="container">
                <div class="row">
                        <div class="col-md-8 col-md-offset-2 post-div">
                                <div class="post-details">
                                        <h2><?php echo $post['title'] ?></h2>
                                        <p><?php echo html_entity_decode($post['body']); ?></p>
                                </div>
                        </div>
                </div>
        </div>

<!-- JQuery -->
<script src="https://cdnjs.cloudflare.com/ajax/libs/jquery/3.3.1/jquery.min.js"></script>

<!-- Bootstrap JS -->
<script src="https://cdnjs.cloudflare.com/ajax/libs/twitter-bootstrap/3.3.7/js/bootstrap.min.js"></script>

<!-- JQuery scripts -->
<script>

</script>

</body>
</html>
At the top section, we connect to the database, grab the post id that was sent from the index.php page and query that particular post. The post is then stored in the $post variable which is then displayed on the page.
ez_adNow we can start coding the dynamics of actually uploading the image in the CKEditor. Open scripts.js and replace everything inside with this:
scripts.js:
// initialize ckeditor
CKEDITOR.replace('body');

// Javascript function to copy image url to clipboard from modal
function copyUrl() {
  var copyText = document.getElementById("post_image_url");
  copyText.select();
  document.execCommand("Copy");

  // replace url with confirm message
  $('#post_image_url').hide(1000);
  $('#feedback_msg').show();

  // hide modal after 2 seconds
  setTimeout(function(){
          $('#myModal').modal('hide');
          $('#feedback_msg').hide();
          $('#post_image_url').show();
  }, 2000);
}

$(document).ready(function(){
        // When user clicks the 'upload image' button
        $('.upload-img-btn').on('click', function(){

                // Add click event on the image upload input
                // field when button is clicked
                $('#image-input').click();


                $(document).on('change', '#image-input', function(e){

                        // Get the selected image and all its properties
                        var image_file = document.getElementById('image-input').files[0];

                        // Initialize the image name
                        var image_name = image_file.name;


                        // determine the image extension and validate image
                        var image_extension = image_name.split('.').pop().toLowerCase();
                        if (jQuery.inArray(image_extension, ['gif', 'png', 'jpg', 'jpeg']) == -1) {
                                alert('That image type is not supported');
                                return;
                        }

                        // Get the image size. Validate size
                        var image_size = image_file.size;
                        if (image_size > 3000000) {
                                alert('The image size is too big');
                                return;
                        }


                        // Compile form values from the form to send to the server
                        // In this case, we are taking the image file which
                        // has key 'post_image' and value 'image_file'
                        var form_data = new FormData();
                        form_data.append('post_image', image_file);
                        form_data.append('uploading_file', 1);

                        // upload image to the server in an ajax call (without reloading the page)
                        $.ajax({
                                url: 'index.php',
                                method: 'POST',
                                data: form_data,
                                contentType: false,
                                cache: false,
                                processData: false,
                                beforeSend : function(){

                                },
                                success : function(data){
                                        // how the pop up modal
                                        $('#myModal').modal('show');

                                        // the server returns a URL of the uploaded image
                                        // show the URL on the popup modal
                                        $('#post_image_url').val(data);
                                }
                        });
                });

        });
});
Follow the commenting in this code and you will understand the steps. First, the user clicks on the "upload image" button. This triggers a click event on the file input whose display has been set to none. Once the user selects an image from their local computer, an onChange event is triggered on the file input, and this is where we upload the image using Ajax.
At this point, our image is already being sent to the server in an Ajax request. But so far in our server.php, we have only connected to the database. We haven't yet written the code to receive the image from the Ajax request and upload it to the images folder. Let's do that now.
Open server.php file once more and add this code to it:
server.php:
// ... more code here ...

// if 'upload image' buttton is clicked
if (isset($_POST['uploading_file'])) {
        // Get image name
        $image = $_FILES['post_image']['name'];

        // image file directory
        $target = "images/" . basename($image);

        if (move_uploaded_file($_FILES['post_image']['tmp_name'], $target)) {
                echo "http://localhost/ckeditor-images/" . $target;
                exit();
        }else{
                echo "Failed to upload image";
                exit();
        }
}
This code accepts the Ajax request that comes with the image, uploads the image to the images folder and returns a fully qualified URL to the image. Remember that at this point the user is still busy writing their post on the post creation form and all this is happening in the background.
The URL that has been returned from the server is then displayed on a pop-up modal which pops up for the user to copy the URL. When the modal pops up and the user clicks on the displayed URL, it gets copied to the clipboard and the user can proceed to use this image URL in CKEditor by pasting this URL in the appropriate place.
ez_adWe are pretty much done with the core concept of this tutorial. When remains now is for us to hit submit for our post to be submitted to the server and saved in the database. To do that, we will only touch one file.
Open server.php and add this code at the end of the file:
// ... more code here ...

// if form save button is clicked, save post in the database
if (isset($_POST['save-post'])) {
        $title = mysqli_real_escape_string($db, $_POST['title']);
        $body = htmlentities(mysqli_real_escape_string($db, $_POST['body']));

        $sql = "INSERT INTO posts (title, body) VALUES ('$title', '$body')";
        mysqli_query($db, $sql);
        header("location: index.php");
}
And that brings us to the end of this tutorial. I hope you understood well our objective in this tutorial and how we have addressed it.
A closer look
At this point, everything seems to be working fine. We are uploading an image and using its URL in our CKEditor quite all right, but how efficient is this system. Let's say you start writing a post and along the way you feel exhausted after having uploaded a few images, how do you undo the uploads. How do you free up space on your server? A solution I would propose is that you create an images table in the database that takes only the postID and the name of the image. Each time you upload an image, you save the image name in the images table with null as postID. If you change your mind and don't save the post in the end, the null remains in the images table. Then you can write a script which will query all database images that have null as their associated postIDs. Challenge yourself with this and code it. If you encounter any difficulties, leave it in the comments below and help will come.
As always, thanks for your time. Hope you find this helpful. If you enjoyed this post, then please check out my other tutorials and please share and recommend my site with your friends.
Best regards!
Awa Melvine