I already wrote a blog post on creating a complete user registration and login system using PHP and MySQL but I did not include email verification.
This tutorial is a bit like an update on the previous tutorial. In addition to being able to register, login and log out of their account, a user will also be sent a verification email to their email address with a link where they can click on and have their email address verified.
On most applications you are going to build, it is important to add an email verification feature for many reasons: you may want to send an email later on to the user and want to make sure they're going to see it; or the user might forget their password and need to reset it, and in order to do this, we will need to email them a password reset link; there are many other reasons but you get the point.
In this system we are building today, users who haven't verified their email will not be able to perform certain actions (I will just use a simple demonstration such as viewing a button. Only verified users will be able to see that button).
ez_ad
To begin, create a new PHP project named verify-user and in this folder, create two files: signup.php and login.php.
signup.php:
<!DOCTYPE html>
<html lang="en">
<head>
  <meta charset="UTF-8">
  <meta name="viewport" content="width=device-width, initial-scale=1.0">
  <meta http-equiv="X-UA-Compatible" content="ie=edge">

  <!-- Bootstrap CSS -->
  <link rel="stylesheet" href="https://cdnjs.cloudflare.com/ajax/libs/twitter-bootstrap/4.0.0/css/bootstrap.min.css" />
  <link rel="stylesheet" href="main.css">
  <title>User verification system PHP</title>
</head>
<body>
  <div class="container">
    <div class="row">
      <div class="col-md-4 offset-md-4 form-wrapper auth">
        <h3 class="text-center form-title">Register</h3>
        <form action="signup.php" method="post">
          <div class="form-group">
            <label>Username</label>
            <input type="text" name="username" class="form-control form-control-lg" value="<?php echo $username; ?>">
          </div>
          <div class="form-group">
            <label>Email</label>
            <input type="text" name="email" class="form-control form-control-lg" value="<?php echo $email; ?>">
          </div>
          <div class="form-group">
            <label>Password</label>
            <input type="password" name="password" class="form-control form-control-lg">
          </div>
          <div class="form-group">
            <label>Password Confirm</label>
            <input type="password" name="passwordConf" class="form-control form-control-lg">
          </div>
          <div class="form-group">
            <button type="submit" name="signup-btn" class="btn btn-lg btn-block">Sign Up</button>
          </div>
        </form>
        <p>Already have an account? <a href="login.php">Login</a></p>
      </div>
    </div>
  </div>
</body>
</html>
It's just a simple HTML/CSS file. The only thing worth noting is that we are using the Bootstrap 4 CSS framework to style our page. You can use any other styling framework of your choice or write your own CSS if you want.
vli_adImmediately after the Bootstrap CSS, we are including a main.css file for custom styling. Let's create that file now. In the root folder of the application, create a file called main.css.
main.css:
@import url('https://fonts.googleapis.com/css?family=Lora');
li { list-style-type: none; }
.form-wrapper {
  margin: 50px auto 50px;
  font-family: 'Lora', serif;
  font-size: 1.09em;
}
.form-wrapper.login { margin-top: 120px; }
.form-wrapper p { font-size: .8em; text-align: center; }
.form-control:focus { box-shadow: none; }
.form-wrapper {
  border: 1px solid #80CED7;
  border-radius: 5px;
  padding: 25px 15px 0px 15px;
}
.form-wrapper.auth .form-title { color: #007EA7; }
.home-wrapper button,
.form-wrapper.auth button {
  background: #007EA7;
  color: white;
}
.home-wrapper {
  margin-top: 150px;
  border-radius: 5px;
  padding: 10px;
  border: 1px solid #80CED7;
}
On the first line of this file we are importing and using some Google Fonts to make our fonts look more beautiful.
Now turn to the login.php file and do a similar thing.
login.php:
<!DOCTYPE html>
<html lang="en">
<head>
  <meta charset="UTF-8">
  <meta name="viewport" content="width=device-width, initial-scale=1.0">
  <meta http-equiv="X-UA-Compatible" content="ie=edge">
  <!-- Bootstrap CSS -->
  <link rel="stylesheet" href="https://cdnjs.cloudflare.com/ajax/libs/twitter-bootstrap/4.0.0/css/bootstrap.min.css" />
  <link rel="stylesheet" href="main.css">
  <title>User verification system PHP - Login</title>
</head>
<body>
  <div class="container">
    <div class="row">
      <div class="col-md-4 offset-md-4 form-wrapper auth login">
        <h3 class="text-center form-title">Login</h3>
        <form action="login.php" method="post">
          <div class="form-group">
            <label>Username or Email</label>
            <input type="text" name="username" class="form-control form-control-lg" value="<?php echo $username; ?>">
          </div>
          <div class="form-group">
            <label>Password</label>
            <input type="password" name="password" class="form-control form-control-lg">
          </div>
          <div class="form-group">
            <button type="submit" name="login-btn" class="btn btn-lg btn-block">Login</button>
          </div>
        </form>
        <p>Don't yet have an account? <a href="signup.php">Sign up</a></p>
      </div>
    </div>
  </div>
</body>
</html>
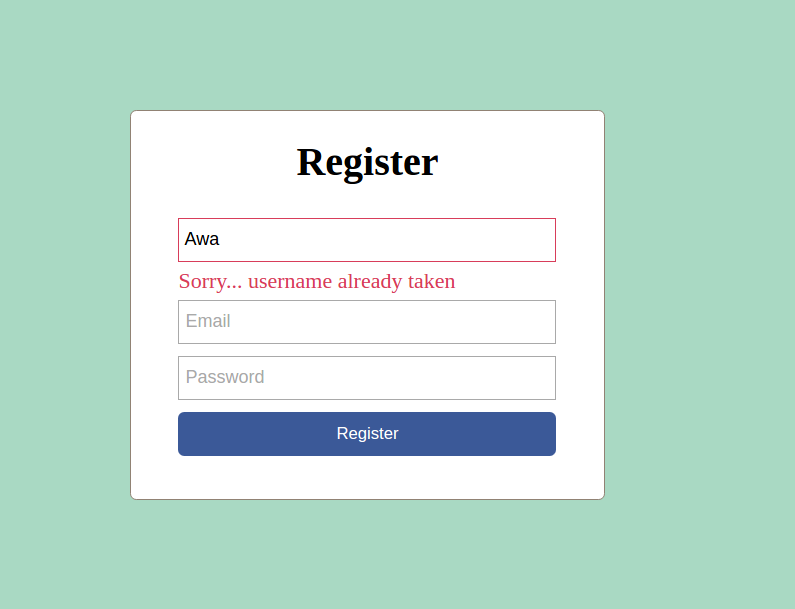
On your browser, go to http://localhost/cwa/verify-user/signup.php you will see a beautiful signup form (same for login). Ignore the errors in the input fields, we will fix that soon.
vli_adFor now, let's set up the database. Create a database called verify-user and in this database, create a users table with attributes as follows:
CREATE TABLE `users` (
 `id` int(11) NOT NULL AUTO_INCREMENT,
 `username` varchar(100) NOT NULL,
 `email` varchar(100) NOT NULL,
 `verified` tinyint(1) NOT NULL DEFAULT '0',
 `token` varchar(255) DEFAULT NULL,
 `password` varchar(255) NOT NULL,
 PRIMARY KEY (`id`)
)
Nothing unusual except, perhaps, the token and the verified fields, which I will explain in a moment.
Now we begin with the actual signup logic. I usually like to refer to the logical part of my application as the controllers and that's what I'll do here. In the root folder of the project, create a folder called controllers and inside controllers, create a file called authController.php.
controllers/authController.php:
<?php
session_start();
$username = "";
$email = "";
$errors = [];

$conn = new mysqli('localhost', 'root', '', 'verify-user');

// SIGN UP USER
if (isset($_POST['signup-btn'])) {
    if (empty($_POST['username'])) {
        $errors['username'] = 'Username required';
    }
    if (empty($_POST['email'])) {
        $errors['email'] = 'Email required';
    }
    if (empty($_POST['password'])) {
        $errors['password'] = 'Password required';
    }
    if (isset($_POST['password']) && $_POST['password'] !== $_POST['passwordConf']) {
        $errors['passwordConf'] = 'The two passwords do not match';
    }

    $username = $_POST['username'];
    $email = $_POST['email'];
    $token = bin2hex(random_bytes(50)); // generate unique token
    $password = password_hash($_POST['password'], PASSWORD_DEFAULT); //encrypt password

    // Check if email already exists
    $sql = "SELECT * FROM users WHERE email='$email' LIMIT 1";
    $result = mysqli_query($conn, $sql);
    if (mysqli_num_rows($result) > 0) {
        $errors['email'] = "Email already exists";
    }

    if (count($errors) === 0) {
        $query = "INSERT INTO users SET username=?, email=?, token=?, password=?";
        $stmt = $conn->prepare($query);
        $stmt->bind_param('ssss', $username, $email, $token, $password);
        $result = $stmt->execute();

        if ($result) {
            $user_id = $stmt->insert_id;
            $stmt->close();

            // TO DO: send verification email to user
            // sendVerificationEmail($email, $token);

            $_SESSION['id'] = $user_id;
            $_SESSION['username'] = $username;
            $_SESSION['email'] = $email;
            $_SESSION['verified'] = false;
            $_SESSION['message'] = 'You are logged in!';
            $_SESSION['type'] = 'alert-success';
            header('location: index.php');
        } else {
            $_SESSION['error_msg'] = "Database error: Could not register user";
        }
    }
}

// LOGIN
if (isset($_POST['login-btn'])) {
    if (empty($_POST['username'])) {
        $errors['username'] = 'Username or email required';
    }
    if (empty($_POST['password'])) {
        $errors['password'] = 'Password required';
    }
    $username = $_POST['username'];
    $password = $_POST['password'];

    if (count($errors) === 0) {
        $query = "SELECT * FROM users WHERE username=? OR email=? LIMIT 1";
        $stmt = $conn->prepare($query);
        $stmt->bind_param('ss', $username, $password);

        if ($stmt->execute()) {
            $result = $stmt->get_result();
            $user = $result->fetch_assoc();
            if (password_verify($password, $user['password'])) { // if password matches
                $stmt->close();

                $_SESSION['id'] = $user['id'];
                $_SESSION['username'] = $user['username'];
                $_SESSION['email'] = $user['email'];
                $_SESSION['verified'] = $user['verified'];
                $_SESSION['message'] = 'You are logged in!';
                $_SESSION['type'] = 'alert-success';
                header('location: index.php');
                exit(0);
            } else { // if password does not match
                $errors['login_fail'] = "Wrong username / password";
            }
        } else {
            $_SESSION['message'] = "Database error. Login failed!";
            $_SESSION['type'] = "alert-danger";
        }
    }
}
If you have followed my previous tutorials, then nothing in this file should be new to you. But for the sake of first-timers, I'm going to do some explaining.
ez_adFirst thing is that we are starting the session using session_start() since we will need to store logged in user information in the session. After starting the session, we are initializing the $username and $email variables which we are using in our forms, and also the $errors array which will hold our form validation errors.
Next, we connect to the database. The next two if statements that follow are respectively the code that gets executed when the user clicks on the signup or the login buttons. In the case of signup, we check to ensure that all required fields have been filled out correctly and only then do we proceed to save the user in the database. We are also generating a token (a unique, random string) and saving it with user as an attribute. This will be used to verify user email. More on it later.
Since our authController.php file is responsible for signup and login, we have to include it at the very top of the signup.php and login.php pages because that is where the form data is being submitted to. Like so:
signup.php and login.php (at the very top):
<?php include 'controllers/authController.php' ?>
If there are any error messages in the $errors array, we need to display them on the form. To do that, add this if statement inside your form directly below the form title for both signup and login pages.
<!-- form title -->
<h3 class="text-center form-title">Register</h3> <!-- or Login -->

<?php if (count($errors) > 0): ?>
  <div class="alert alert-danger">
    <?php foreach ($errors as $error): ?>
    <li>
      <?php echo $error; ?>
    </li>
    <?php endforeach;?>
  </div>
<?php endif;?>
If there are no errors, our script will proceed to save user in the database. After saving the user in the database, we log them in immediately. In our case, logging a user in means storing their data in the session and that's what we just did.
ez_adAt this point, you can already register and even log in a user. But after logging in, you will be redirected to the index.php page which doesn't exist. We'll create it soon.
In authController.php, we are storing message and type variables in the session to be displayed as soon as the user has logged in. message is the actual text of the message while the type is the Bootstrap styling class that will format the message with appropriate colors depending on the type value.
This message is displayed after the user has logged in and it is displayed on the index.php file. Let's create that file now in the root folder of our project.
index.php:
<?php include 'controllers/authController.php'?>
<?php
// redirect user to login page if they're not logged in
if (empty($_SESSION['id'])) {
    header('location: login.php');
}
?>
<!DOCTYPE html>
<html lang="en">
<head>
  <meta charset="UTF-8">
  <meta name="viewport" content="width=device-width, initial-scale=1.0">
  <meta http-equiv="X-UA-Compatible" content="ie=edge">

  <!-- Bootstrap CSS -->
  <link rel="stylesheet" href="https://cdnjs.cloudflare.com/ajax/libs/twitter-bootstrap/4.0.0/css/bootstrap.min.css" />
  <link rel="stylesheet" href="main.css">
  <title>User verification system PHP</title>
</head>

<body>
  <div class="container">
    <div class="row">
      <div class="col-md-4 offset-md-4 home-wrapper">

        <!-- Display messages -->
        <?php if (isset($_SESSION['message'])): ?>
        <div class="alert <?php echo $_SESSION['type'] ?>">
          <?php
            echo $_SESSION['message'];
            unset($_SESSION['message']);
            unset($_SESSION['type']);
          ?>
        </div>
        <?php endif;?>

        <h4>Welcome, <?php echo $_SESSION['username']; ?></h4>
        <a href="logout.php" style="color: red">Logout</a>
        <?php if (!$_SESSION['verified']): ?>
          <div class="alert alert-warning alert-dismissible fade show" role="alert">
            You need to verify your email address!
            Sign into your email account and click
            on the verification link we just emailed you
            at
            <strong><?php echo $_SESSION['email']; ?></strong>
          </div>
        <?php else: ?>
          <button class="btn btn-lg btn-primary btn-block">I'm verified!!!</button>
        <?php endif;?>
      </div>
    </div>
  </div>
</body>
</html>
This page is meant to be accessible only to logged in users. That is why at the top section of the file, we are redirecting the user to the login page if they are not logged in. Somewhere at the center of the page, we are displaying the message. After displaying the message, we un-set the message and type variables because we don't want it to remain there on the page even after the user refreshes the page.
Lastly, at the center of the page, we perform a check to see whether the logged in user has verified their email address or not. Remember we added the verified variable in the session when we logged the user in. If the user has been verified, then we display the "I'm Verified!!!" button for them to see. If they are not verified, we tell them about the verification link we sent to their email address and we ask them to click on that link to verify their email.
ez_adVerify Email
In authController.php file, we used a comment to indicate where we would send the verification email to the user by calling the sendVerificationEmail(). Go to the authController.php file and uncomment the function call thus:
// TO DO: send verification email to user
sendVerificationEmail($email, $token);
We will define this function in another file and include that file inside authController.php. Inside controllers folder, create a file named sendEmails.php.
Before we add any code in this file, let me say a bit about PHP SwiftMailer, the popular library for sending emails in PHP which we are going to use in this project to send emails from localhost.
SwiftMailer is a popular feature-rich library for sending emails in PHP applications.
To use Swiftmailer, you would first need to install Composer. Once you've installed composer, open your terminal or command line and navigate to the root folder of the project and run the following command to add the Swift Mailer library with all its files to our project:
composer require "swiftmailer/swiftmailer:^6.0"
This creates a vendor folder in the root of our application containing all the code (classes) required for sending an email and it also creates a composer.json file in the root of the application that looks like this:
{
    "require": {
        "swiftmailer/swiftmailer": "^6.0"
    }
}
Now open the sendEmails.php file we created earlier and let's write the function sendVerificationEmail():
<?php
require_once './vendor/autoload.php';

// Create the Transport
$transport = (new Swift_SmtpTransport('smtp.gmail.com', 465, 'ssl'))
    ->setUsername(SENDER_EMAIL)
    ->setPassword(SENDER_PASSWORD);

// Create the Mailer using your created Transport
$mailer = new Swift_Mailer($transport);

function sendVerificationEmail($userEmail, $token)
{
    global $mailer;
    $body = '<!DOCTYPE html>
    <html lang="en">

    <head>
      <meta charset="UTF-8">
      <title>Test mail</title>
      <style>
        .wrapper {
          padding: 20px;
          color: #444;
          font-size: 1.3em;
        }
        a {
          background: #592f80;
          text-decoration: none;
          padding: 8px 15px;
          border-radius: 5px;
          color: #fff;
        }
      </style>
    </head>

    <body>
      <div class="wrapper">
        <p>Thank you for signing up on our site. Please click on the link below to verify your account:.</p>
        <a href="http://localhost/cwa/verify-user/verify_email.php?token=' . $token . '">Verify Email!</a>
      </div>
    </body>

    </html>';

    // Create a message
    $message = (new Swift_Message('Verify your email'))
        ->setFrom(SENDER_EMAIL)
        ->setTo($userEmail)
        ->setBody($body, 'text/html');

    // Send the message
    $result = $mailer->send($message);

    if ($result > 0) {
        return true;
    } else {
        return false;
    }
}
ez_ad
The first statement requires the autoload.php file into this file. This autoload.php file will automatically include all the classes from the Swift Mailer library in the vendor folder that we use in this file.
We are using Gmail in this example. So you can replace the SENDER_EMAIL and SENDER_PASSWORD with your Gmail address and password that you want to use as the sender's email address. (The receiver's email address is the one submitted via the form).
Normally, in order to send an email to somebody, you need to sign into your Gmail account before you compose the mail and send. It is the same sort thing the Swift Mailer library does. So when the receiver ($userEmail) receives the email, it is your Gmail address (SENDER_EMAIL) they will see as the sending email.
Now we are calling the sendVerificationEmail() function in our authController.php file but we defined the function inside sendEmails.php file. Let's include the sendEmails.php file inside our authController.php in order to make this function available in the file. At the top of authController.php, just before session_start(), add the following line:
require_once 'sendEmails.php';
That's all we need, gentlemen (and ladies) to send an email to our user with an email verification link. But we are working on localhost and Gmail will block any sign in attempts from Swift Mailer running on localhost.
ez_adSending email from localhost
If you want this to run on localhost you will need to configure your Gmail account to accept sign in from less secure apps. Of course, this can pose some vulnerability on your Gmail account but you can do it only for the short time that you need to test this application on localhost. After testing, you can undo the setting on your Gmail account. Once your application has been hosted on the internet, you will work. We're only doing this because we're on localhost.
You can be even more cautious and create another Gmail account only for such purposes as these.
So sign into your Gmail on your browser, go to https://myaccount.google.com/security#connectedapps and change the' Allow less secure apps' value to ON.

You can turn this off once you're done testing the project on localhost.
With this, you will be able to send an email from localhost with verification link once the user signs up. Now look at the sendVerificationEmail() method again and you will notice that in the body of the email we are sending to the user, the token we generated for that particular user (the token is unique) has been set as a parameter on the link so that when the user clicks on the link in the email, they will be directed to our application on a page called verify_email.php with that token on the URL. Like this:
<a href="http://localhost/cwa/verify-user/verify_email.php?token=0a150966418fa3a694bcb3ab8fcacd2063a096accc0ee33c3e8c863538ee825c0b52f2e1535d0e1377558c378ba5fc3106eb">Verify Email!</a>
So we can get this token in our verify_email.php like this (calm down, we'll create this verify_email.php soon):
$token = $_GET['token'];
We can now use this token to fetch the user who has this particular token (remember the token is unique) and if we get that user, we update their record changing the verified attribute to true in the database. Then, we can proudly say we have verified that user's email address.
ez_adLet's create this verify_email.php file in the root folder of our project:
verify_email.php:
<?php
session_start();

$conn = new mysqli('localhost', 'root', '', 'verify-user');

if (isset($_GET['token'])) {
    $token = $_GET['token'];
    $sql = "SELECT * FROM users WHERE token='$token' LIMIT 1";
    $result = mysqli_query($conn, $sql);

    if (mysqli_num_rows($result) > 0) {
        $user = mysqli_fetch_assoc($result);
        $query = "UPDATE users SET verified=1 WHERE token='$token'";

        if (mysqli_query($conn, $query)) {
            $_SESSION['id'] = $user['id'];
            $_SESSION['username'] = $user['username'];
            $_SESSION['email'] = $user['email'];
            $_SESSION['verified'] = true;
            $_SESSION['message'] = "Your email address has been verified successfully";
            $_SESSION['type'] = 'alert-success';
            header('location: index.php');
            exit(0);
        }
    } else {
        echo "User not found!";
    }
} else {
    echo "No token provided!";
}
Note that setting the value of verifed value to 1 is the same as setting it to true since in MySQL database type Boolean is interpreted as tinyint.
Now when the user clicks on the link in their email and it takes them to this page, it updates that user's verified status to true, logs them in and redirects them to the index.php page. In the index page, after verifying user, you will notice that the warning message advising user to verify their email address is now gone and in its place we have the "I'm verified!!!" button that is only visible to verified users.
One very last thing, on the index.php page after logging user in, there is a logout link which points to a logout.php file which is supposed to log the user out. Let's created that file in the root of our application:
logout.php:
<?php
session_destroy();
unset($_SESSION['id']);
unset($_SESSION['username']);
unset($_SESSION['email']);
unset($_SESSION['verify']);
header("location: login.php");
So in addition to being able to signup, verify email, sign in, user can now also logout.
Conclusion
So that's about it with user registration and email verification. If you have any comment, questions or words of encouragement, please leave them in the comment below. And please, do remember to share this post or recommend this site to your friends if you found it helpful. It encourages me a lot!
Have a great day!
Awa Melvine
ez_ad